Sunday, July 28, 2013

Cupcake Saturday! (On Sunday)

How come Monday is so far from Friday and Friday is so close to Monday?! We had quite a busy weekend but needed to get our Cupcake Saturday in. I almost forgot about it yesterday, but on the way to pick up E & S from the airport it hit me! So here's this week's Cupcake Saturday Sunday.

This week, we made Mississippi Mud Pie Cupcakes. It's a good thing we did so much walking around yesterday, since these cupcakes are definitely not low anything, except gluten. We spent the day seeing just about everything they wanted to see in Seattle, which meant several hours of walking. Since S has Celiac disease, we needed to make sure that they were GF so she can enjoy them too! We started off with Betty Crocker's GF cake mix, put marshmallows and chocolate frosting in the inside, cooked them, and BAM! They made such a mess oozing out. The pan will need a heavy duty soaking tonight.

After prying them out of the pan, they were topped with more chocolate frosting, chopped pecans, and a mini marshmallow. Like I said, definitely not low-anything, but at least this week we have help eating them!

Thanks for stopping by!

Saturday, July 27, 2013

Kitchen Vinyl Project

I hope everyone has some fun plans for the weekend. I know that as soon as I finish posting this, we get to take a drive up to Seattle to pick up the family from Texas! They're super excited to come and explore the PNW and we're happy to have them. It's been just about two years since we've seen them, so it will be nice to have them here for the week.

Today's post is a super quick kitchen project we did a little while back. Our kitchen is decorated in red, white, and black. Since we're only renting and don't want to paint or redo anything, we mostly decorate with our appliances and other things on the counters. We found these plain red canisters at IKEA the last time we went and knew they would look much better than the gingerbread ones we had in there before. (I know, gingerbread are awesome, but not really year-round.)
 

But they were definitely boring. We gave them a face lift with some leftover black and white vinyl, with the names of what's inside each one. Since they were still a little plain, we added some adhesive rhinestones around the frame, which you can see in the next picture. They jazzed them up and made them more girly.


Thanks for stopping by!

Friday, July 26, 2013

Spa Gift Set

Happy Friday, everyone! I hope the week went by pretty quick for you. I know it did here. We have a busy week coming up with family visiting!! We're definitely looking forward to that, and I know they are too, since they will be getting a reprieve from the Texas heat!
Anyway, today's project is perfect for a Friday afternoon, or weekend, or any time, really. We made this super cute relaxation kit for our brother's girlfriend's birthday.
We figured that after having to deal with our brother all the time, she needed something to help her relax! This box has everything she needs, except the wine, but only because they frown up sending wine through the mail... We were busy in the kitchen making the various scrubs and bath salts (not the drug kind, don't worry!) and decorated the mason jars with little labels. Michael's had some great finds in their Dollar Spot, or whatever they call it with all of their matching items. We went with the purple and teal color scheme, and found a really cute matching box, which is just a photo box.

The card to go with it is a 5x7 with a chica in the same color scheme. Since no birthday card is complete without some glitter, we added some to the bathtub to make the bubbles look extra inviting.

 Here are the box and card together. I hope she enjoys some alone time with it!
 Thanks for stopping by!

Thursday, July 25, 2013

Happy Birthday Cards

I hope everyone is having a great week so far! Just a couple more days till the weekend. We have some birthday cards to share today. We made three in coordinating brights, even though the camera didn't really do them justice.
 
The cards are A2 (4 1/4x5 1/2). They are sort-of shape cards that you can see in these two pictures.
But the fun part was making the embossed frosting. After some practice, I got it to look pretty smooth. I guess my paper cakes are like my actual cakes, when the frosting isn't quite right, but still looks pretty good. The finishing touch was a little puffy paint on the candle flame.
Thanks for stopping by!

Wednesday, July 24, 2013

Everything's Just Beachy!


I just want to start by channeling the camel on the Geico commercial- It's Hump Day!
Now that that's out of the way, here's today's project. It's a beach theme layout with the title "Just Beachy."

There are three mats for 4x6 pictures, perfect for showing off those beach pictures. I used some shiny papers for the sand and water.

This layout was entered in the BBTB2 Beach Time Challenge here.

And here's today's holiday project.We made some fun Halloween cards to share with you.

The frames were embossed with our new embossing toys. Do I need more excitement in my life if watching the powder heat up is fun? The silhouettes in the middle were also embossed, cut out, and mounted with puffy adhesive to give them more dimension. And all frames need a little bling, so we added some around the outside of them.

Thanks for stopping by!


Tuesday, July 23, 2013

A Great Pear! Card

I hope everyone is having a terrific Tuesday so far! We have two fun projects to share with you today. The first one is a quick card I made for the FCCB Fruit Salad Challenge here.
This is a perfect little card for any couple. I love the color combination, but I don't know if a guy would necessarily like it :) I used the Serenade cartridge for the very pretty pears, and a fun flowery embossing folder for the back.

The second project is our holiday-themed project for the day. After yesterday's Christmas card, we figured that as a way to get everything done in time for the holidays, we would do one project a day, more or less. So today's holiday post is a glittery wonderland. It's "The Santa Express, {No. 25}
 

There is a lot of glitter going on in this layout. I had planned some more on the trees, but thought this might be good enough. Here's the train, covered in glittery snow. And a close-up of the passenger card.
Here's the title and a close-up of the caboose. I love how the wheels came out on this.

Thanks for stopping by!

Monday, July 22, 2013

A Few New Cards

I hope everyone had a fantastic weekend. I know we did. It was a fantastically crafty weekend, getting orders done, redoing our crafty area so it's not spread out over the entire apartment, and getting some new cards finished. We have three to share with you today. (I'm sorry in advance for the terrible lighting in the pictures. I guess my phone didn't want to be cooperative today.)

With Royal Baby Fever at an all-time high today, our first two cards are geared towards a younger crowd.
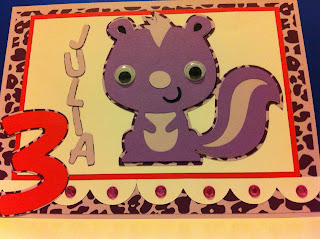
While neither "royal" or "newborn," they are adorable cards for youngsters. These personalized cards would make great birthday cards, with the child's name and age. The little critters and their big buggy eyes are too cute to pass up! (Is it just me, or does everything look better with googly eyes?)


Our third card to share today is a simple Christmas card. (Hey, it's never too early to start, is it? I just got an email with 75 Christmas gifts to make today.) I was looking for different challenges to put our work into, and found some new ones. The links are below. 

Challenges:
CAS on Sunday "Kraft and Twine" here.
Paper Crafting Journey "Christmas in July" here.

Thanks for stopping by!

Sunday, July 21, 2013

Just Chillin'

I hope everyone is having a great weekend so far! We've been pretty busy with all of our fun new toys from the Scrapbook Expo on Friday. Here's a picture of some of the goodies we bought.

And today's project uses some of that good stuff.

So my picture isn't straight, but that doesn't take away from the adorableness of it! We got some a bunch of different colors of glitter, and a heat tool for embossing, among other things. We've had different embossing powders, and have used our hair dryer, which definitely doesn't work as well. I don't know how we've done without it! The little penguin is stamped and embossed, and the paper is super glittery, since everything needs glitter! The inside sentiment says, "Just Chillin'"- perfect for a sunny summer day.

Thanks for stopping by!

Saturday, July 20, 2013

Cupcake Saturday!

I'm so excited to share these cupcakes today! The other day, we showed some of the adorable Baby Pooh things we are working on, and these go right along with them.

These honey pot cupcakes were so easy to make, but look awesome. These are just plain yellow cupcakes, frosted with lemon yellow buttercream, and stuck into a terracotta planter. They are decorated with paper cutouts saying "hunny," just like Pooh spells it. There is cupcake underneath there, but they're way too cute to dig through!

It could definitely be painted, or drawn on, but I'm much neater with paper. The honey around the top is just a strip of paper, trimmed to look like it's dripping down the sides. Again, could definitely be paint, but I'm just not that artistic, either.

No honey pot is complete without a buzzing bee or two flying around!

Thanks for stopping by!

Friday, July 19, 2013

Another Wedding Invitation

Happy Friday! We hope everyone had a wonderful week. Or tried to, at least. It's kind of tough to enjoy yourself, or do anything, really, when it's so hot. So we can't think of a better way to spend a gorgeous day, with a high of 85 and lots of sun, than inside at a scrapbook expo, right?! OK, there are other ways to spend it, but not too many chances to go someplace and see all the new, fun toys that you really want but will have to restrain yourself from getting.

Anyway, we have been looking to expand our online shop a bit, including our invitations. We've done a few wedding invitations for customers (and are actually about to start another!), and wanted to add some new types to offer.  Today's project is a new sample we've designed.
This invitation isn't quite as intricate as our others, but definitely looks like a million bucks! We have included some elegant embossing, which is always a nice touch. It is also slightly larger than our others, which allows for greater possibilities.

So, friends from (apparently) everywhere but the great Northwest, try to stay cool. We're thinking of you!
Now, to go find our shopping bags...

Thanks for stopping by!

Thursday, July 18, 2013

Bedroom Makeover!

I hope everyone is having a fantastic week so far. We've been pretty busy around here today, but didn't get much paper crafting done. Just business of the cleaning sort. Boring, right? But I wanted to make a quick post showing off some of the bedroom decor I made earlier this summer. It was definitely time for a change from my darker, winter colors.

Here's the room before:

It didn't really need a style update, for me at least, but the color was dark and it was just time for a change. I will probably go back to it come fall, but for now, it looks like this:
I love the gray and yellow color scheme. It brightens up the room a lot, perfect for summer. Even with the gray, it is pretty cheery. I found the directions for the duvet cover at Be Sweetly Inspired here. I didn't quite follow all of her directions, but got the general idea there. It was a set of king sized sheets and after it was pintucked, sewn wrong sides together. It looks hard, time consuming, and expensive, but wasn't at all!
The next step was the accents and extras around the room. I went over to Joann's, and after getting distracted and looking at everything in the store, went over to the fabric section. Luckily, since I had the solid gray and yellow, finding a pattern that matched wasn't hard. I got about 3 1/2 yards and was able to do all of those little pretties around. (It was a couple of months ago, but I think it was 3 1/2, maybe 3, maybe 4... somewhere in there. And of course you'd have to measure your own, but that's a rough estimate to start with.)

I cut the strips for the bed skirt by measuring the length (times two) and the width of the bed, and then how far I wanted it to be on the floor. After those three easy cuts, I attached the skirt with Velcro. This way, later on when I want to change it, it just pulls off, and a new one can be put up.


The bed skirt took up most of the fabric, but there was still enough to cover up the two lampshades. They needed it after a previous not-so-well-done decor project. There are a ton of tutorials out there to learn how to do this.
I don't have a headboard with my bed, but I needed something on the wall behind the bed. You can see the one that was there before, which clearly wouldn't match the yellow and gray. So we had one canvas at home, left over from another project, and I got two more for the set of three. They were recovered with the fabric rectangles. The hardest part of this was making sure they were straight and spaced evenly, or evenly enough.
And there was just enough left over to recover the small pillow in the middle, finishing off the look. I love the update and it makes going to sleep even more inviting at night! Or sleeping in.

Thanks for stopping by!

Wednesday, July 17, 2013

A Sneak Peek!

I'm so excited to share this project today. It's a small part of a bigger project we're going to work on, but this is what we've done so far.

There's no baby on the way for anyone we know, but we were making some shower cards for others and thought the baby Pooh characters would be awesome for a shower. This centerpiece would make any table complete!


Not too much to say about this project, because the pictures say enough of the adorableness here!

Thanks for stopping by!

Tuesday, July 16, 2013

4th of July Layout

So I've decided that the best way to keep on top of scrapping every day moments and celebrations is to do them right away. Go figure, right? Says the girl who hasn't finished her's from several summers ago... Maybe now I'll actually do it. Maybe...
Here's a 4th of July layout to share today. I found the sketch over on SOUS (and entered it into their challenge here.) It was perfect to show off our 4th picnic.
We've had this paper floating around for a while and I couldn't figure out anything to use it for. Even though the colors are your "normal" red, white and blue, it is definitely patriotic, and therefore perfect for this. You can see it better in the picture below, but there is a really fun starbust-type design in the corner. I didn't want to cover it with the elements from the page, so I tried my hand at cutting around the design to put it on top of the elements. It came out better than I thought it would! Not perfect, since the blade is a little dull, but definitely got the job done.
Now that the layout is done, I just need to add photos. So much for finishing a layout on time.

It is also linked up to the SOUS Die Cut Flourish Challenge here.

Thanks for stopping by!

Monday, July 15, 2013

Flip Flop Kind of Day!

The biggest misconception about the Pacific Northwest is probably that it rains all the time. This is definitely not true. Our summers are absolutely gorgeous! When everyone else is sweltering in hot and humid grossness, we have sunny 75-80 degrees. I'll take rainy misty winters if this is the summer we get in return! All this weather talk really does have something to do with today's post, I promise! I have a fun little summer card to share with you.
It has been a tank top and flip flop type of summer. And "wool-socks-and-sandal-dude" can wear just his sandals. Don't know what I'm talking about? Find out more here: http://northwestspecialties.com/article/pemco-sandals-and-socks-guy

The inside of the card has some of the lyrics to Kenny Chesney's "Flip Flop Summer." Today's card is linked up with the FCCB "Set the Scene" challenge here.

Thanks for stopping by!

Saturday, July 13, 2013

Our 500th Post!

I have some good news, and some bad news. First, the good. Today marks our 500th post! Pretty exciting! Hopefully though, that number will go up considerably since we will be posting on a more regular basis. Maybe... Bad news, we don't have a cupcake to share for Cupcake Saturday today. Boo. We got home yesterday after four long days on the road, and didn't quite feel like baking today. Funny how traffic ALWAYS gets backed up so close to the end of a trip. As soon as we hit Connecticut two weeks ago, BAM! As soon as we hit Tacoma yesterday, DOUBLE BAM! Oh well. We made it back safe and sound, with the only two blemishes being really strong thunderstorms camping in Ohio, and Dawn dumbly locking her keys in the car in Montana. Oops.
Anyway, along the way, we realized that we haven't finished our scrapbooks from our cross country trip two summers ago. I think we've only made it to the Midwest on those. So I figured I'd work on one today. While catching up on all those other awesome blogs out there, the BBTB2 challenge was Disney! I suppose I could've scrapped our trip to Disney World, but somehow that didn't come to mind until just now... I wanted to make one using the Bambi cuts on the Disney Classics cartridge.

I love the cut with Bambi looking at his tail and thought that it would be perfect to help show off our pictures from Hurricane Ridge in Olympic National Park. The deer were so used to people being around that they came within a few feet of us. The ones at home get spooked if you're within yards of them. It was pretty neat being that close to them. (You can see the feet of snow behind him in the middle of July!)

The title was cut in the Pooh font, and of course Bambi needed some friends, so I added Thumper and some fun 3-D butterflies flitting around the page.

This project is linked up with the BBTB2 "We Love Disney" challenge here and the Fantabulous Cricut "Cute as a Bug" challenge here.

Thanks for stopping by!