Good Sunday morning! We hope everyone is having a superb weekend so far. We're sure everyone is gearing up for the Oscars tonight. Unfortunately, we haven't seen too many movies this year, and since none of the ones up for Best Picture are out on DVD yet, we haven't seen any of them. (OK, we're cheap and would rather spend our money on clothes and crafting supplies than on movies) A few of them are on the to-be-seen list, though. But we have been to the theater where they are held- does that count?! And let's be honest, seeing the dresses the actresses wear is the best part!
Anyway, talking about being frugal and looking your best, today's (somewhat long, picture-heavy) tutorial is on how to make old jeans fit better. At $30-$40 a pair, we don't like to buy new pants too often (So we wait until they're on sale at Old Navy). We wear them until they are no longer wearable, sometimes even longer. However, last week we plunged into the 'skinnier jean' fad (because they were on sale!) We liked how they fit, and didn't drag so much on the ground. We thought that since we had a few pairs of older, much worn jeans, we would DIY them into skinny jeans. These new pants may be more of the 'boyfriend' style, since they are a bit looser on top. These are the much-loved jeans we worked with, along with
Step One: Making Your Mark
As you can see, these boot-cut pants are cut wider from the knee down. As you can see, there are two ways you can go about when determining your measurements. The green line shows the first method. You can take a pair of your favorite skinny jeans, line them up, and trace them onto the bigger pair. The second way, which is how I did it, was to put them on and have your lovely sister pin them for you. This seems to be easier, as long as you don't prick yourself trying to take them off (So, from now on, ignore the green line)
Either way, take the extra denim from only one side of the leg, so you only have to make one seam, instead of both.
Step Two: Check Fit
This seems like a silly step, but make sure the pants fit well. At this point, I decided I liked how one leg fit better than the other. If you like how they fit, you can continue onto step three. Since I didn't like the one leg, I carefully took them off and took my ruler and made both sides even. I measured the good side and made points on the other side, and then connected the dots. I also repinned along the line. I don't know if that makes sense, and unfortunately, I don't have a picture of this step.
Step Three: The First Stitch
Keeping the pins in place, I drew a line along the pants, where I wanted my seam to be. Now, onto the sewing. I sewed a normal, single stitch along the line:
When you finish both legs, try them on again the right way. (There's a lot of trying-on in this process) There may be quite a bit of extra fabric in there, but see if you like how they look the right way. I used this stitch in case I needed to change something and the possibility of having to seam-rip an intricate stitch wasn't something I was looking forward to. Luckily, everything fit correctly, and comfortably.
Step Four: The Seam Stitch
With everything fitting, the next step is to do the seam. Since you probably don't want your pants splitting down the side when you wear them, this is a pretty important step. Now, I'm not one to make a lot of clothing (I still have a dress to finish...from two years ago...) so there might be a better, more 'proper' way to do this step. If so, please let me know! Anyway, I used a zigzag stitch, #3 on my sewing machine.
It was a toss-up between #3 and #7 to use. I read somewhere the zigzag stitch allowed for more stretch, so I went with it. I stitch the entire seam twice, just to enforce it.
Step 5: The Hem
This step is kind of self-explanatory, I think. Using the same length as the model pair, I made my 1/2" seam. I used the horizontal line that I had drawn before, and used that for my hem length.
Step Six: Trimming
The next step is to trim all of the extra denim.
I left a little along the seem, just in case. And I didn't want to accidentally cut the thread. I saved the extra pieces for another possible project later on. And finally,
Step Seven: Modelling!
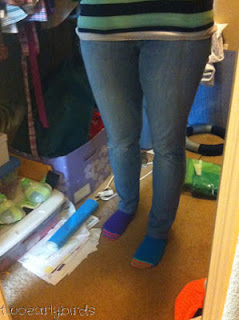
This is the best, and easiest, step of all! Take some time to model your new pants!
There are a few different ways to wear these. The first is to wear them 'normal', which would be good with almost any shoe or boot. The second is my personal preference, which is cuffed a little. This is so much easier, and neater, without all that extra denim. This style is perfect for those warm spring days or cool summer nights. Can't you tell we're ready for winter to be over?!
This was a nice break from our other projects. Now it's time to continue on with those superheroes... I know there are a whole bunch of these tutorials out there, on sites like Pinterest, so thanks for stopping by and reading our version!


No comments:
Post a Comment