Showing posts with label DIY. Show all posts

Sunday, August 27, 2017

Snack is Coming!

Hi there! I know we have been missing here for the last few months. Even with summer vacation, there doesn't seem to be enough hours in the day for everything. Perhaps one of these days we'll finally get it down and be able to get everything done, as planned.
Anyway, today's post has been a few weeks in the making. You may have heard of a little show called "Game of Thrones". If not, you may live under a rock. (It's OK, I have been told I grew up under one 😉) When Caleb and I first started going out, he introduced me to the show with the "Red Wedding" (Imagine red cornstarch, EVERYWHERE...) It took me another few months to get over that episode and we started watching from the beginning. The only problem- it's addicting. For the last three seasons, we've re-watched the entire series. This season has gotten him through the work week this summer, and we've looked forward to it every Sunday.
When this season began, we decided we wanted to throw a season premiere viewing party. Then it turned into a season finale viewing party. I started gathering a few ideas earlier this week, but then we decided against it because Sunday afternoons are kind of rough around here. However, as I was looking on Pinterest for ideas, I found a super cute shirt for the Little One.
For those of you who don't watch the show, the Nights Watch is the group of men who protect the Wall that stands between the Seven Kingdoms and the land beyond. For those of you who do watch the show, I didn't spell it wrong. I mean, I guess technically, yes, but it is a play on their last name. (I thought it was clever...) Then, the one shirt led to a handful of onesies for the future Littlest One:
These are all show-themed sayings and designs, changed to fit babies and kids. I absolutely LOVE how these came out- and I got to use up some materials, which is always a great feeling! 
And to enjoy while watching tonight, we made some "White Walker Direwolf Chow":

In the show, the White Walkers are a mysterious group of the undead that have come back and everyone has to come together in order to conquer them. The direwolf is the symbol of House Stark, and if I had to guess, Ghost is going to come help Jon and Co. Below are the directions to make this treat. This version is super quick and easy, and takes about 15 minutes to make, which includes melting time. Serving size depends on a few things, especially if you're anything like me and snack as you go. This recipe can also be doubled or halved quite easily.
Ingredients:
  • 5 cups Rice Chex (or a combination. I like Rice Chex because they're gluten free and have a 'neutral' taste, so you don't have to use a lot of other things to cover it up. You know?)
  • 1/4 cup peanut butter
  • 1/2 cup chocolate chips
  • 3/4 cup powdered sugar 
  • Blue, white, and black sprinkles and blue chocolate candies
Directions:
  1. In a double boiler (or, if you're like me, you can use a glass bowl and water-filled saucepan), melt the peanut butter and chocolate. 
  2. Pour cereal into a mixing bowl. Slowly pour the peanut butter and chocolate over the cereal, and toss. Coat the cereal pieces completely. (Snack on the biggest chocolate-covered cereal piece you can find.)
  3. Pour the powdered sugar and cereal mixture into a gallon-sized plastic bag. Seal tightly and shake. Make sure the cereal is entirely covered in the sugar. (Eat the biggest chunk you can find in the bag.)
  4. Add the sprinkles and candies into the bag and shake again to mix. (Munch on a handful of the other colored candies) Enjoy the peanut butter and chocolatey goodness as you watch an episode or ten of Game of Thrones
Now, I'd be lying if I didn't say this is really just another version of the iconic "Muddy Buddy" or "Puppy Chow" (hence the Direwolf reference). The combination of chocolate, powdered sugar, candies, and the sprinkles make it a perfectly tasty representation of the characters on the show. I actually lucked out and found a "Blizzard Mix" of sprinkles, which works even better for this mix.


Sunday, December 4, 2016

On the Fourth Day of Christmas

Santa brought an idea for a quick, last-minute gift!
We all know how busy it can get around this time of the year- obviously. And if you're anything like us, it always seems like you need to add one more person to the list. And then another. And another. (I definitely added three more to mine yesterday...) Whether it's a teacher at school or the letter carrier (two highly unappreciated jobs, especially around this time of the year, in my opinion) or you need a quick fix for one of those parties that sneak up on you (Secret Santa, White Elephant, etc), having something small on hand to give them isn't a bad idea.
Today's project is a little coffee mug with a few yummy treats included.

Obviously, there are a million ways to run with this project. Since we wanted the coffee mug to be used for more than just Christmas, but still with the holiday feel, we went with a wintery theme for our mug. We made a basic hot chocolate mix to put into the mug, which includes layers of crushed peppermint chips (you can use chocolate chips, peanut butter chips, other kinds of baking chips, too) and small marshmallows. The gift was finished off with a small plate of shortcut peppermint chocolate chip cookies with a mocha glaze.
The recipes we used for both the hot cocoa mix and cookies can be downloaded below. We've included some other ideas to add to a basic hot chocolate recipe, as well, to make it your own!

You can download the files here:
2016 Holiday Planner Insert & Recipes
"Cold Hands, Warm Heart" Studio File

Thanks for stopping by! Have a fantastic day!

Friday, August 29, 2014

This Year Will Be A Hoot!

Good evening! We hope everyone had a fantastic week and we're sure everyone is looking forward to the long weekend. We are looking forward to enjoying our last weekend of summer (it's official, Fall has started here in western Washington- the pools have been emptied!! It's all good, though!) We'll be spending it working on some last-minute finishing touches in the classroom(s).
Today's post features some of the classroom decorations we've worked on this summer. These pictures are from Robyn's adorable wise owl-themed room. It is a little picture-heavy, sorry! The first picture is probably the cutest part of the classroom:
It is the AR chart for her classes. The tree is divided into sections, representing the students' reading progress. Each 25% increment has a cute little owl. Each student has their own leaf, which will get moved once they improve through the school year. Hopefully they'll all be at the top of the tree at the end of the year! (The desk was clean at one point!) The next picture is a set of two bulletin boards.
The first one will be for writing tips, to help the students become "wise writers". The other board is one of three student "brag" boards, that will hold some of the students' work. Each kid has their own labelled clothespin to hold their work. The tree is conveniently placed to cover up an unsightly gap between the two boards and pulls the design together. (And why wouldn't the Harry Potter collection make an appearance in a 6th grade classroom?!) The next two pictures are of the other two 'brag" boards:

You can also see the classroom set of star students (so much easier than cutting them all out by hand!) The picture also shows off the classroom library. You can't tell in the picture, but we spent a few days painting it teal and adding some sparkle to it. It's super cute! There is one more bulletin board, but it isn't quite finished. The last is a little banner we made to tie everything together:
The banner is surrounded by two more owls, ready to learn. We decided to not add close-ups of the banner (it would have been too many pictures), but the two end pieces also have little owls on them, sitting on a branch. We used quite a few pop-dots on them, and added some googly eyes! Then there is last year's apple wreath (which matches somewhat quite nicely!) (Also, side comment- the building was just power-washed and the windows look terribly dirty, but it's water-stained) We also made some matching owl name tags for each student, that will be put on their desks. Phew! Here's to a new school year!
We have a few more pictures we want to share from some other classrooms, but wanted to start off with this one! Thanks for stopping by! Have a great night!

We are entering these projects into a crafting challenge or two:
Fantabulous Cricut: Back to School (owls- Wild Card 2; Letters- Birthday Cakes, Nate's ABC's)

Friday, January 31, 2014

Blue Friday!

Happy Friday! We hope everyone had a wonderful week. It has been a long two weeks, with all of the Super Bowl hubbub around here. It is pretty exciting, anyway. We decided to join the masses this week and celebrate Blue Friday, which is pretty much 'show all your 12th Man Pride. (It is also a good excuse to wear jeans and a t-shirt to work!) We made a cute little scarf to show our spirit:
 
(Fortunately their colors are nice and complimentary to our eye color!) Any, this is a super simple t-shirt scarf, made from three old shirts. With the scraps, we made a flower to cover up the seam.
We added some sparkle to flower with a little sparkly tulle. This was the longest part, but the entire project took about 45 minutes. The best part of these is that you can change the colors pretty easily. Nothing is actually sewn, just wrapped together. We plan on making a few of these, and since they're lightweight, you can wear them all year round.
Thanks for stopping by! Have a wonderful weekend and go Hawks!

Sunday, September 15, 2013

My Bathroom Redo


Good morning! We hope everyone is having a fantastic weekend. We’ve been busy getting caught up on all of the work we didn’t do yesterday, along with some new projects we found and just have to try out!! Hopefully they will go as planned and we can share them in a few weeks. If not, then we’ll just have a bunch of yarn hanging around.
Today’s post was originally going to be a tutorial, but as I was writing it, I thought that it would be hard to follow. It something that’s been hanging around for a few months, but it wasn’t fully completed until last night’s addition of the curtain rings:
 
I would love to say this was totally my idea, but I can’t take any credit for it. Unfortunately. Similar shower curtain DIY’s are all over the internet and Pinterest. They are all remakes of this Anthropologie curtain that sells for $118.00. That’s just an absurd amount of money to spend on bathroom décor, so I decided to make one myself for around $20.00. The most expensive part was actually the rings to hold it up (the old blue ones weren’t working for me). I used 3 sheets in all. The two pink ones are queen-sized sheets that I found for $5.00 a piece, and the third was the original shower curtain I had up (which was also somewhere around $5.00, too). In actuality, I got the pink sheets to make a bedspread, but I thought it was time to spruce up the bathroom. There was a whole lotta fabric, a bit of extra thread, and some fighting words, but it is totally worth it. I won’t lie, I kind of feel like a princess whenever I get into the shower…
And the frame with flowers also helps. It's a happy reminder of our amazing trip a few summers ago. They were taken at the International Rose Test Garden in Portland.
Thanks for letting me share by bathroom stories! Or, just the bathroom. Thanks for stopping by and have a great day!

Thursday, July 18, 2013

Bedroom Makeover!

I hope everyone is having a fantastic week so far. We've been pretty busy around here today, but didn't get much paper crafting done. Just business of the cleaning sort. Boring, right? But I wanted to make a quick post showing off some of the bedroom decor I made earlier this summer. It was definitely time for a change from my darker, winter colors.

Here's the room before:

It didn't really need a style update, for me at least, but the color was dark and it was just time for a change. I will probably go back to it come fall, but for now, it looks like this:
I love the gray and yellow color scheme. It brightens up the room a lot, perfect for summer. Even with the gray, it is pretty cheery. I found the directions for the duvet cover at Be Sweetly Inspired here. I didn't quite follow all of her directions, but got the general idea there. It was a set of king sized sheets and after it was pintucked, sewn wrong sides together. It looks hard, time consuming, and expensive, but wasn't at all!
The next step was the accents and extras around the room. I went over to Joann's, and after getting distracted and looking at everything in the store, went over to the fabric section. Luckily, since I had the solid gray and yellow, finding a pattern that matched wasn't hard. I got about 3 1/2 yards and was able to do all of those little pretties around. (It was a couple of months ago, but I think it was 3 1/2, maybe 3, maybe 4... somewhere in there. And of course you'd have to measure your own, but that's a rough estimate to start with.)

I cut the strips for the bed skirt by measuring the length (times two) and the width of the bed, and then how far I wanted it to be on the floor. After those three easy cuts, I attached the skirt with Velcro. This way, later on when I want to change it, it just pulls off, and a new one can be put up.


The bed skirt took up most of the fabric, but there was still enough to cover up the two lampshades. They needed it after a previous not-so-well-done decor project. There are a ton of tutorials out there to learn how to do this.
I don't have a headboard with my bed, but I needed something on the wall behind the bed. You can see the one that was there before, which clearly wouldn't match the yellow and gray. So we had one canvas at home, left over from another project, and I got two more for the set of three. They were recovered with the fabric rectangles. The hardest part of this was making sure they were straight and spaced evenly, or evenly enough.
And there was just enough left over to recover the small pillow in the middle, finishing off the look. I love the update and it makes going to sleep even more inviting at night! Or sleeping in.

Thanks for stopping by!

Sunday, March 3, 2013

Kindle Cover DIY Tutorial

I'm really excited to share today's post with you. Here's the tutorial for the kindle cover that I made. It is very picture-heavy, but it is so much easier to see what's going on in pictures versus in words. I would say the whole project cost less than $5, which is so much better than the $20+ you could spend, and it's totally customizable. After figuring out the first one, I would say it took less than 20 minutes as well. It takes longer than that to look through all the online and in-store options!

Here's what you need:
- A composition notebook or other hard-cover book  (The sturdier it is, the better. I found a pretty sturdy one at Walmart for under $2. The black and white ones aren't super, but they'll still work.)
- Fabric scrap choices-
*one at least the dimensions on your notebook, plus 2-3 inches for folding over
*a strip in a coordinating pattern, optional
*flannel, fleece, or batting, optional, but gives it a little more sturdiness and padding
-1/8" elastic
- hot glue gun/sticks (I like it because it's so easy to work with. I went through about 7 or 8 sticks per cover.)
- cardboard scraps (at least the size of your kindle or reader)
- iron, optional
-scissors
-pencil or pen
-ruler
-your Kindle or tablet for measurements

Step One:
Remove pages from book. Just snip the strings.
Step Two:
Lay out your fabric to covering the outside of the notebook. This is why I said the iron is optional. As you can see, the fabric was very wrinkly, but if you pull it tight enough around the book, you won't be able to tell! Glue the fabric to the outside, pulling as tight as possible. Make sure that the fabric is wrong side up.Don't be afraid to use a lot of glue! You don't want it to be saggy. Turn it over and glue the fabric to the inside of the notebook.

Step Three:
Fold down any extra fabric you have. This part reminds me of the beginning of the school year when we would have to cover our books (before the stretchy book covers they have now) and we would use brown paper bags. I glued the corners down onto the fabric, to make the folding all of it down easier.
I used a lot more fabric than was probably necessary, but this way you don't have to worry about covering up as much of the notebook as you would if the outside fabric was cut shorter. I hope that makes sense! After folding and covering the book, we have that space to hide. Using the coordiinating fabric, cut a strip to your desired width. It has to be at least twice as long as the book plus some, so it will go all the way around. I attached it with the hot glue again (stick # 4 maybe?)
Put the notebook to the side. We'll come back to it.

Step Four:
Now we are going to start working on the home for the Kindle. Take your cardboard and cut to slightly bigger than your Kindle measurements. I would give measurements, but they are all different sizes... Cover the cardboard with your batting and fabric. Again, I used hot glue for this step as well. Pull the fabrics nice and tight so it doesn't sag.
Before (the back of the cardboard before fabric) and after (the front with the Kindle on it.) The extra space around it will make adding the elastic easier.
Step Five:
This is the hardest part of the project: marking where to put the holes for the elastic. Knowing that the holes should actually be underneath the Kindle so it can be nice and snug, I marked my holes 3/4" in from each side, and at a diagonal. I tried to show my measurements, but like I said, since they are all different sizes, it may be different for you.
Poke holes through all of the layers to thread the elastic through. I needed to use scissors and my cricut poker, but whatever works best for you! After getting the holes in, thread the elastic, about 4 inch pieces,  through your holes, with the ends at the back. Glue them down nice and tight so they don't move or loosen up. It's okay if it looks ugly, since it won't show anyway.

What it looks like with the elastics in place.
Step Six:
Take the whole middle piece, and using LOTS of glue, glue it into the notebook. This will cover any gaps you may have between all of the layers. To cover any gaps you may have on hte other side, you can glue in another piece of cardboard or coordinating paper.
 
 Now the main part is all done. If you want to, add a ribbon under that outside "binding" strip to tie it closed.

Here are all three of the covers I made (one for each of us and mom.) They can be held in either orientation, and since it's just a pretty-fied notebook, they don't take up any more room than that!


Now it's your turn! Let me know if you've made one and I'd love to share it!

Thanks for stopping by!

Sunday, February 24, 2013

A DIY Tutorial- Boyfriend Jeans

Good Sunday morning! We hope everyone is having a superb weekend so far. We're sure everyone is gearing up for the Oscars tonight. Unfortunately, we haven't seen too many movies this year, and since none of the ones up for Best Picture are out on DVD yet, we haven't seen any of them. (OK, we're cheap and would rather spend our money on clothes and crafting supplies than on movies) A few of them are on the to-be-seen list, though. But we have been to the theater where they are held- does that count?! And let's be honest, seeing the dresses the actresses wear is the best part!
Anyway, talking about being frugal and looking your best, today's (somewhat long, picture-heavy) tutorial is on how to make old jeans fit better. At $30-$40 a pair, we don't like to buy new pants too often (So we wait until they're on sale at Old Navy). We wear them until they are no longer wearable, sometimes even longer. However, last week we plunged into the 'skinnier jean' fad (because they were on sale!) We liked how they fit, and didn't drag so much on the ground. We thought that since we had a few pairs of older, much worn jeans, we would DIY them into skinny jeans. These new pants may be more of the 'boyfriend' style, since they are a bit looser on top. These are the much-loved jeans we worked with, along with
Step One: Making Your Mark
As you can see, these boot-cut pants are cut wider from the knee down. As you can see, there are two ways you can go about when determining your measurements. The green line shows the first method. You can take a pair of your favorite skinny jeans, line them up, and trace them onto the bigger pair. The second way, which is how I did it, was to put them on and have your lovely sister pin them for you. This seems to be easier, as long as you don't prick yourself trying to take them off (So, from now on, ignore the green line)
Either way, take the extra denim from only one side of the leg, so you only have to make one seam, instead of both. 
Step Two: Check Fit
This seems like a silly step, but make sure the pants fit well. At this point, I decided I liked how one leg fit better than the other. If you like how they fit, you can continue onto step three. Since I didn't like the one leg, I carefully took them off and took my ruler and made both sides even. I measured the good side and made points on the other side, and then connected the dots. I also repinned along the line. I don't know if that makes sense, and unfortunately, I don't have a picture of this step.
Step Three: The First Stitch
Keeping the pins in place, I drew a line along the pants, where I wanted my seam to be. Now, onto the sewing. I sewed a normal, single stitch along the line:
When you finish both legs, try them on again the right way. (There's a lot of trying-on in this process) There may be quite a bit of extra fabric in there, but see if you like how they look the right way. I used this stitch in case I needed to change something and the possibility of having to seam-rip an intricate stitch wasn't something I was looking forward to. Luckily, everything fit correctly, and comfortably.
Step Four: The Seam Stitch
With everything fitting, the next step is to do the seam. Since you probably don't want your pants splitting down the side when you wear them, this is a pretty important step. Now, I'm not one to make a lot of clothing (I still have a dress to finish...from two years ago...) so there might be a better, more 'proper' way to do this step. If so, please let me know! Anyway, I used a zigzag stitch,  #3 on my sewing machine.
 
It was a toss-up between #3 and #7 to use. I read somewhere the zigzag stitch allowed for more stretch, so I went with it. I stitch the entire seam twice, just to enforce it.
Step 5: The Hem
This step is kind of self-explanatory, I think. Using the same length as the model pair, I made my 1/2" seam. I used the horizontal line that I had drawn before, and used that for my hem length.
Step Six: Trimming
The next step is to trim all of the extra denim.
I left a little along the seem, just in case. And I didn't want to accidentally cut the thread. I saved the extra pieces for another possible project later on. And finally,
Step Seven: Modelling!
This is the best, and easiest, step of all! Take some time to model your new pants!
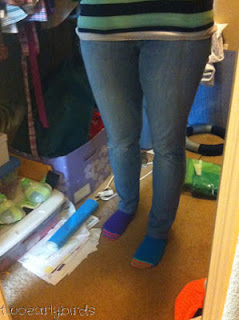
There are a few different ways to wear these. The first is to wear them 'normal', which would be good with almost any shoe or boot. The second is my personal preference, which is cuffed a little. This is so much easier, and neater, without all that extra denim. This style is perfect for those warm spring days or cool summer nights. Can't you tell we're ready for winter to be over?!
This was a nice break from our other projects. Now it's time to continue on with those superheroes... I know there are a whole bunch of these tutorials out there, on sites like Pinterest, so thanks for stopping by and reading our version!

Friday, February 15, 2013

One More Valentine's Day Project!

Good morning! We hope everyone had a wonderful (Single's Awareness) day yesterday. For being two single ladies, ours wasn't too bad. We had a few kids ask us if we'd be their Valentine, (but we're pretty sure it was because they felt bad for us!) We spent the evening watching the hot guys on The Vampire Diaries, some wine, and a pizza. Can't get much better than that! And to top it off, it's the start of another long weekend, with temperatures in the mid-50's! (and a little bit of rain, of course).
Today's project is our last Valentine's Day project for this year. It is a quick hot chocolate gift set. We wanted to make something that would go with our coffee syrup kit, but was appropriate for a child. We figured the next best warm drink to coffee was hot chocolate! We added four little packages of hot chocolate mix, figuring these looked a little nicer than the packages from the box, some little chocolates, and some mini marshmallows, but those are hiding. (Who knew you can get a whole container of just hot chocolate marshmallows?! We'll have to see what kind of recipes we can make with them!!)
This was our first attempt at actually painting on a coffee mug. The other times we've decorate mugs, we've done so with vinyl and Sharpies. We wrote out the name first and then went over it with an acrylic paint. (Recommendation- have your design drawn out first, in case you spell something wrong, or don't like the look of it.) We've seen the idea on Pinterest before, which is where we got the Sharpie idea. Unfortunately, the marker ones washed off only after a few handwashings. Here's to hoping this lasts longer!
Thanks so much for stopping by! Join us tomorrow for another Cupcake Saturday!

Monday, February 4, 2013

Been There, Ran That

I hope everyone had a great weekend! Today definitely feels like Monday morning here, but hopefully it will pick up a little. I was busy yesterday, between Super Bowl commercials, making today's project.

We've had our race medals hanging off of doorknobs, and each time we walked by, they clanged together, quite annoyingly. So I set out to find a hanger for all of them. They start around 45 dollars for simple, non-personalized ones. Well, that just wasn't going to work for us!

This is what we came up with to show them off. (It's not quite done. I still need to find something just right to put in the middle, but that will come soon enough.)
 We took a 15x30 canvas (on sale!) and painted it. The "Been There, Ran That" is cut at 3.5" from the Birthday Cake Cartridge. The medals are on cup hooks set an inch apart, screwed into the canvas's frame, and the bib numbers are hanging off of cup hooks as well. (Pushed through the canvas and hot glued on the back to keep them in place.)
This is what it looks like hanging up on the wall. I'm pretty excited about it, especially since there is still room to add more in the future. And the best part is that the whole thing was under $15!
 Thanks for stopping by!